本篇文章给大家带来的内容是关于Navicat连接MySQL8.0的方法(有效),有一定的参考价值,有需要的朋友可以参考一下,希望对你有所帮助。
今天下了个 MySQL8.0,发现Navicat连接不上,总是报错1251;
原因是MySQL8.0版本的加密方式和MySQL5.0的不一样,连接会报错。
试了很多种方法,终于找到一种可以实现的:
更改加密方式
1.先通过命令行进入mysql的root账户:
PS C:\Windows\system32> mysql -uroot -p
再输入root的密码:
Enter password: ******
Welcome to the MySQL monitor.  Commands end with ; or \g.
Your MySQL connection id is 18
Server version: 8.0.11 MySQL Community Server - GPL
Copyright (c) 2000, 2018, Oracle and/or its affiliates. All rights reserved.
Oracle is a registered trademark of Oracle Corporation and/or its
affiliates. Other names may be trademarks of their respective
owners.
Type 'help;' or '\h' for help. Type '\c' to clear the current input statement.
mysql>
2.更改加密方式:
mysql> ALTER USER 'root'@'localhost' IDENTIFIED BY 'password' PASSWORD EXPIRE NEVER;
Query OK, 0 rows affected (0.10 sec)
3.更改密码:
mysql> ALTER USER 'root'@'localhost' IDENTIFIED WITH mysql_native_password BY 'password';
Query OK, 0 rows affected (0.35 sec)
4.刷新:
mysql> FLUSH PRIVILEGES;
Query OK, 0 rows affected (0.28 sec)
// 如果报错 ERROR 1396 (HY000): Operation ALTER USER failed for 'root'@'%' :
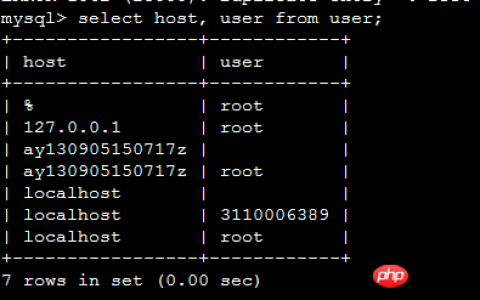
则是远程访问权限不正确,先选择数据库,查看一下再更改:
mysql> use mysql;
Database changed

mysql> select user,host from user;
+------------------+-----------+
| user             | host      |
+------------------+-----------+
| mysql.infoschema | localhost |
| mysql.session    | localhost |
| mysql.sys        | localhost |
| root             | localhost |
+------------------+-----------+
rows in set (0.00 sec)
以上就是Navicat连接MySQL8.0的方法(有效)的详细内容,更多请关注学派吧其它相关文章!
主题测试文章,只做测试使用。发布者:云大使,转转请注明出处:https://www.xp8.net/data/2138.html
 微信扫一扫
微信扫一扫